With the improvement of people’s quality of life, as well as the importance of drinking water health, water purifiers are becoming increasingly popular, slowly becoming a necessary small household appliance in people’s lives, from the water quality, home water purification system are divided into two categories, one is ultrafiltration water purifier, one is RO water purifier, the installation of both water purifiers are similar, RO water purifier is electrically charged, the installation to be slightly more troublesome, generally know the installation method of RO water purifier, ultrafiltration water purifier does not matter, the following we will introduce the installation method of water purifier
October 8, 2022
 Preparation tools
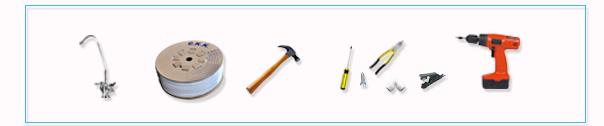
STEP ONE
Select the installation location, the basic requirements of the installation location.
 、Install the home water purification system close to the water source and power supply, and drainage should be easy
 、Water purification system installation location will not interfere with other daily operations of the user
 、Install the water purification system and piping in a place where it will not be exposed to the sun
 、Try to install in places where there is a drainage floor drain, such as the kitchen, bathroom, avoid installing in the vicinity of wooden floors or valuable items
STEP TWO
Mark the selected installation location with a pen, punch a hole with an electric hammer, and fix the pegboard to the wall with expansion screws.
、The pegboard hole should be horizontal to avoid tilting
、Fixing screws must be tightened to withstand the weight of the water purification system
STEP THREE
Installation of cartridge
、Note the order of cartridges before and after: (PP-UDF-CTO-RO-T33)
、Granular activated carbon is installed in the direction of the arrow of the cartridge
、Note when tightening the filter bottle: first gently shake the bottle to feel no resistance before completely tightening, to prevent the cartridge from moving sideways and causing internal leakage
、Be careful not to damage the O-ring when tightening the filter bottle. If the O-ring falls off easily, put a little petroleum jelly on the O-ring
STEP FORTH
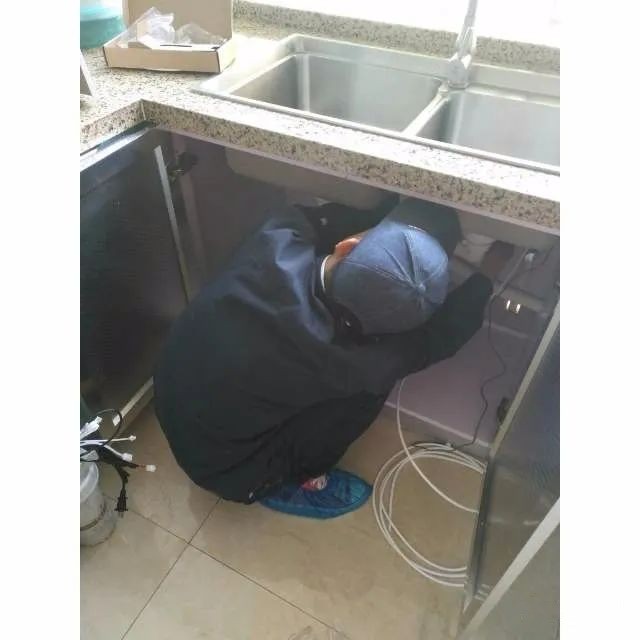
Installation of water inlet tee and water inlet ball valve
、Close the user’s main water inlet valve or the corner valve inside the cabinet, open the faucet to drain the remaining water inside the pipe
、Spin down the user’s faucet or the cold water connection hose inside the cabinet, wrap the raw material tape around the external threads of the random water inlet tee and connect it to the water pipe; wrap the raw material tape around the external threads of the water inlet ball valve and connect it to the internal threads on the side of the water inlet tee; put the water faucet or connection hose back on.
、Close the water inlet small ball valve, open the main water valve or the angle valve under the cabinet, the water inlet tee just installed to test the leakage, check whether there is leakage or seepage phenomenon
、The water inlet of the machine is connected to the water inlet small ball valve (the water inlet ball valve should not be opened)
 、The water inlet tee must be connected to the cold water line (to prevent damage to the RO membrane due to misconnection to the hot water line)
STEP FIFTH
Installation of gooseneck faucet
、according to the actual situation of the user, choose the way to fix the gooseneck faucet (countertop installation or wall-mounted installation)
、Punch a hole in the selected position, and fix the gooseneck faucet
、Connect one end of the PE pipe with the gooseneck faucet, and the other end with the water purifier’s water purifier
STEP SIXTH
Installation of pressure tank
、Wrap the raw material tape around the water inlet of the pressure tank
、Screw the pressure drum ball valve onto the pressure tank
、The pressure tank ball valve should not be skewed when screwed in to prevent the plastic threads from slipping.
、The pressure barrel ball valve should not be tightened too much to prevent damage to the ball valve.
After installation, start cleaning the cartridge and RO membrane, many people will make a mistake in this step, cleaning the pre-filter and RO membrane at the same time, in fact, this is not right, because the activated carbon cartridge in the pre-filter in the first flush process will be missed toner, toner into the RO membrane is easy to cause the RO membrane clogging, so that the life of the RO membrane is greatly reduced, the correct approach is in the cleaning of the third stage The correct practice is to connect a water pipe at the outlet of the third stage, and then put the water for some time, observe the water situation, only until the water quality becomes clear, and then connect back to the water pipe, and finally the RO membrane cleaning, RO membrane general cleaning for about half an hour, RO membrane protective fluid rinsed clean, no odor in the water, can be used normally.


